Build Your Own Discord Bot
Build an AI-powered Discord bot using DevBox. You'll create a bot that can respond to messages using AI capabilities powered by FastGPT.
Overview
This example demonstrates how to build an AI-powered Discord bot using DevBox. You'll create a bot that can respond to messages using AI capabilities powered by FastGPT, showcasing how to integrate multiple services and APIs in a DevBox environment.
Technologies Used:
- Node.js
- Discord.js
- FastGPT API
- DevBox development environment
Expected Outcome:
- A functioning Discord bot that:
- Responds to basic commands
- Integrates with FastGPT for AI-powered responses
- Handles real-time message events
- Processes natural language queries
Prerequisites
- A Discord account with administrator privileges
- Basic knowledge of JavaScript/Node.js
- Access to FastGPT platform
- The following credentials:
- Discord Bot Token
- FastGPT API Key
- FastGPT Base URL
Step-by-Step Guide
1. Setting Up Discord Application
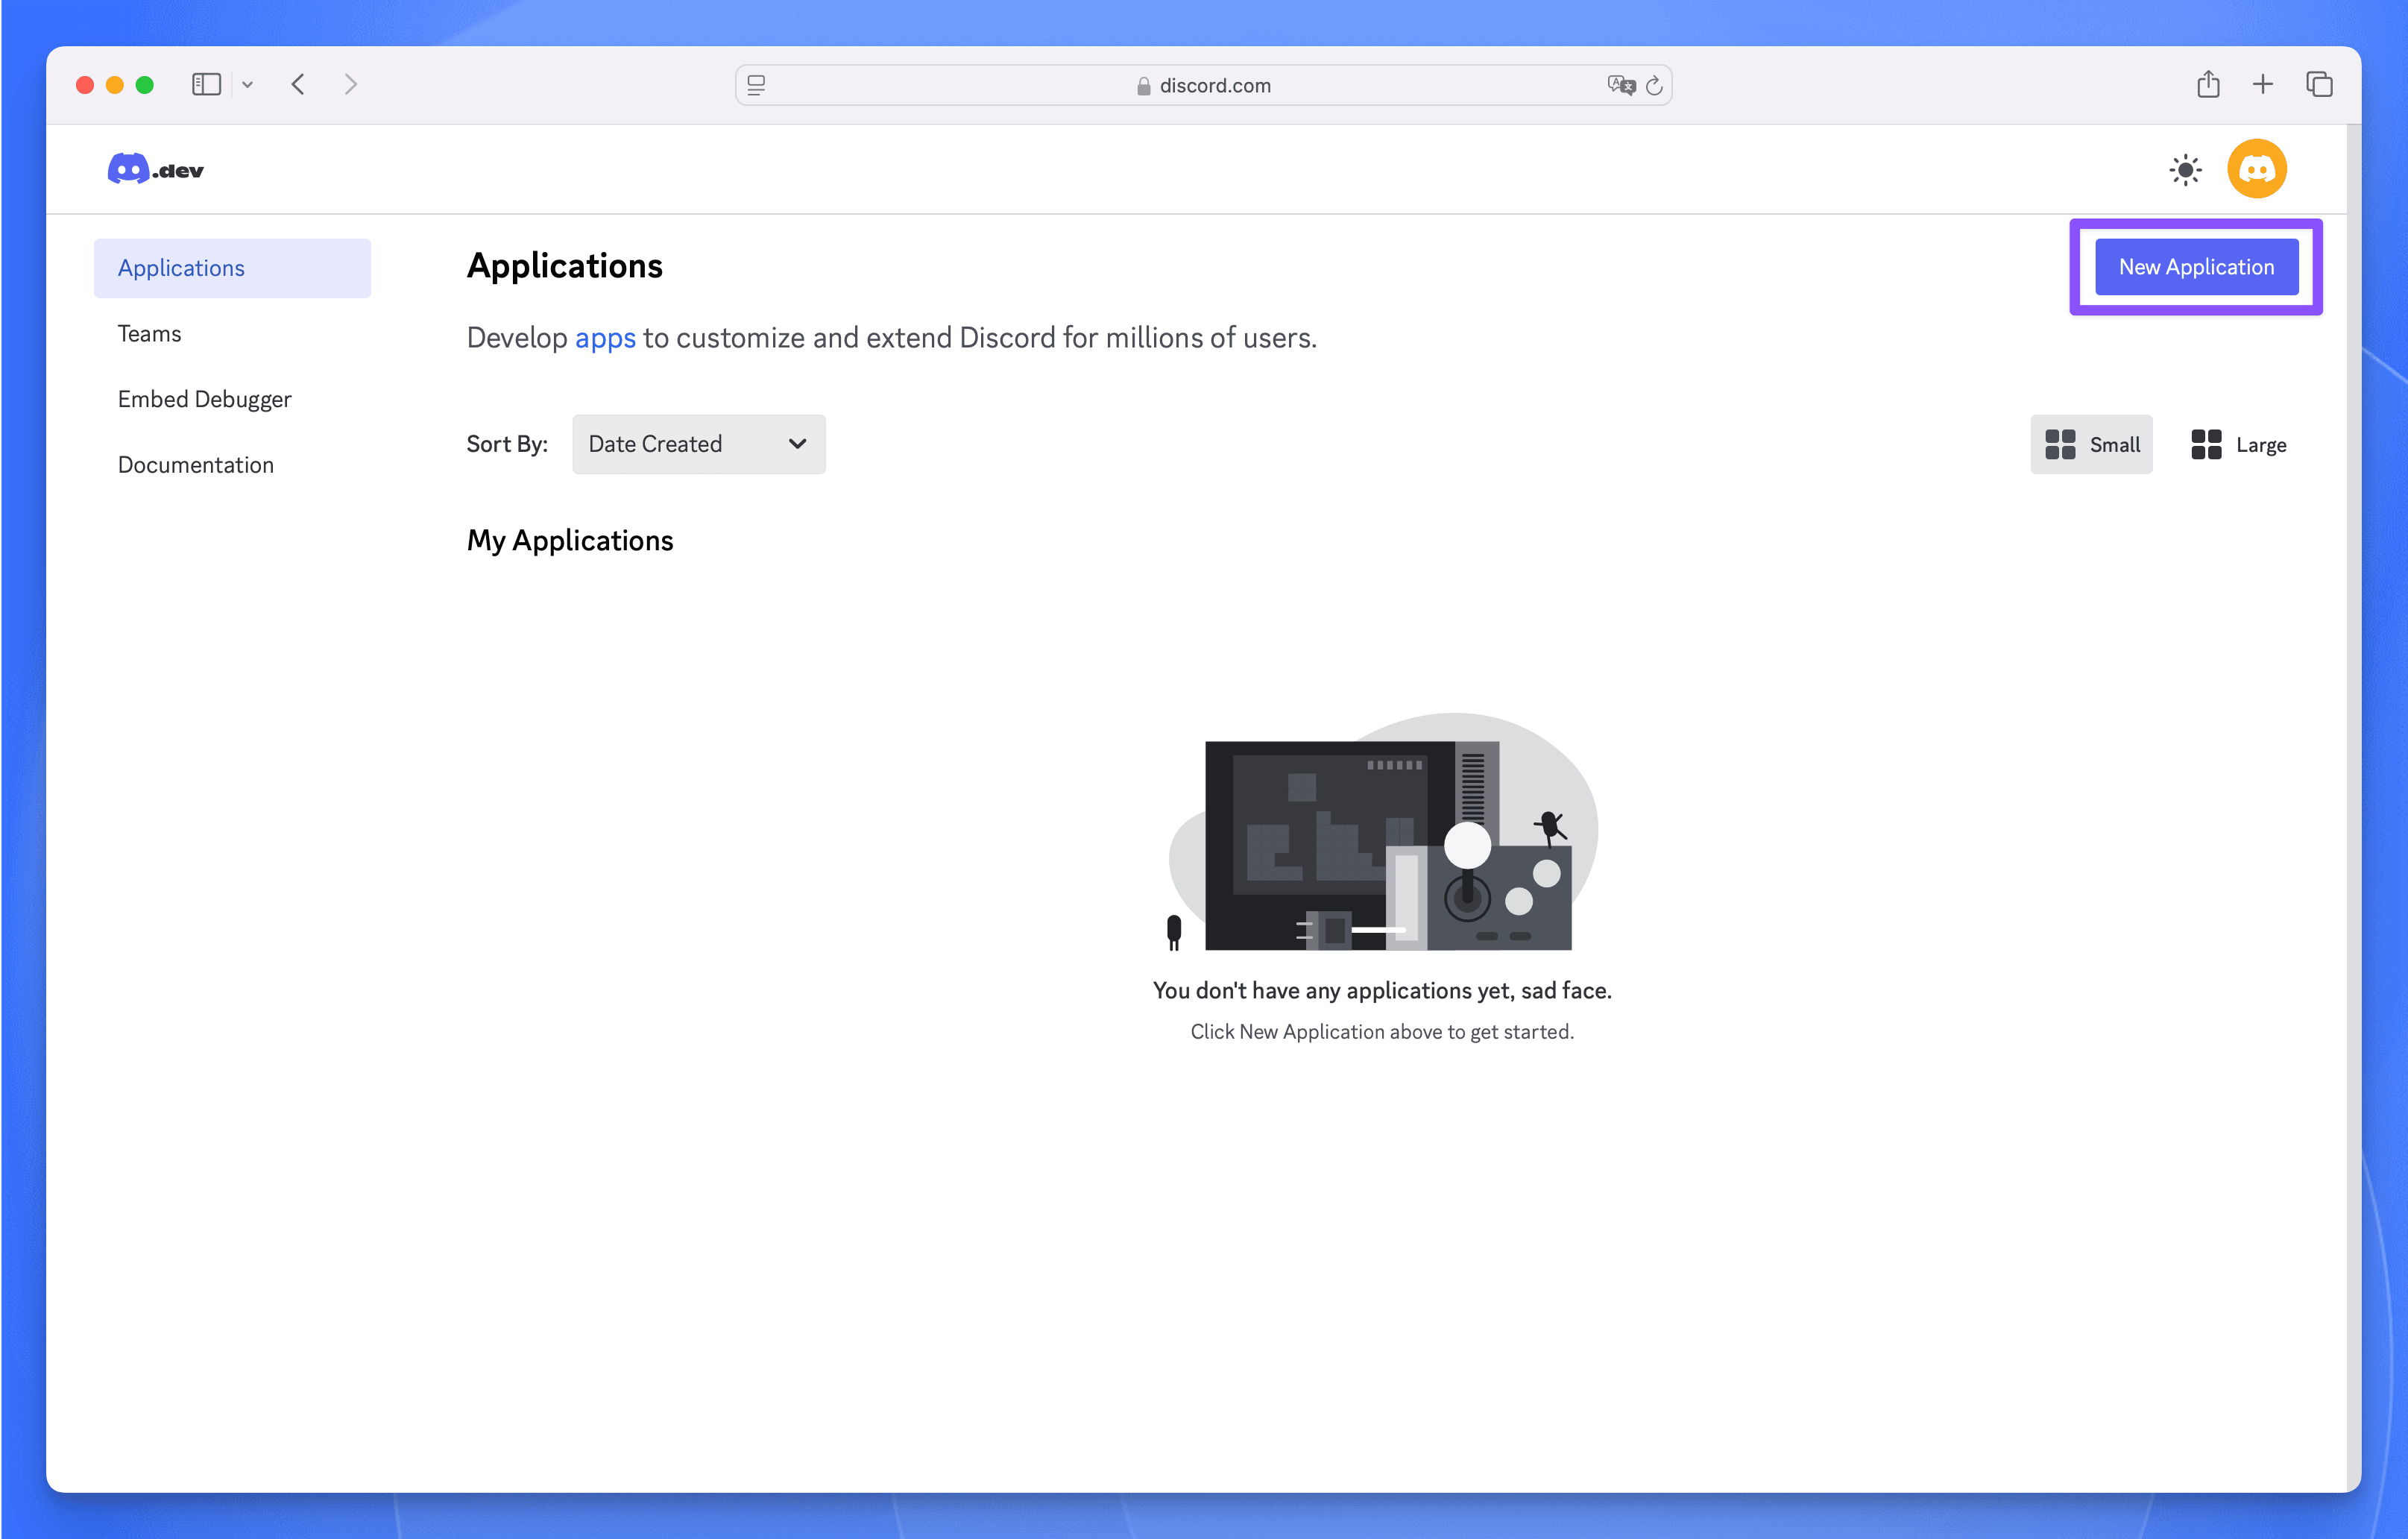
Create Discord Application
- Visit the Discord Developer Portal
- Click "New Application" and choose a name for your bot. This name will be displayed in your Discord server
Configure Bot Permissions
- Navigate to the "Bot" section
- Enable required intents:
- Server Members Intent
- Message Content Intent
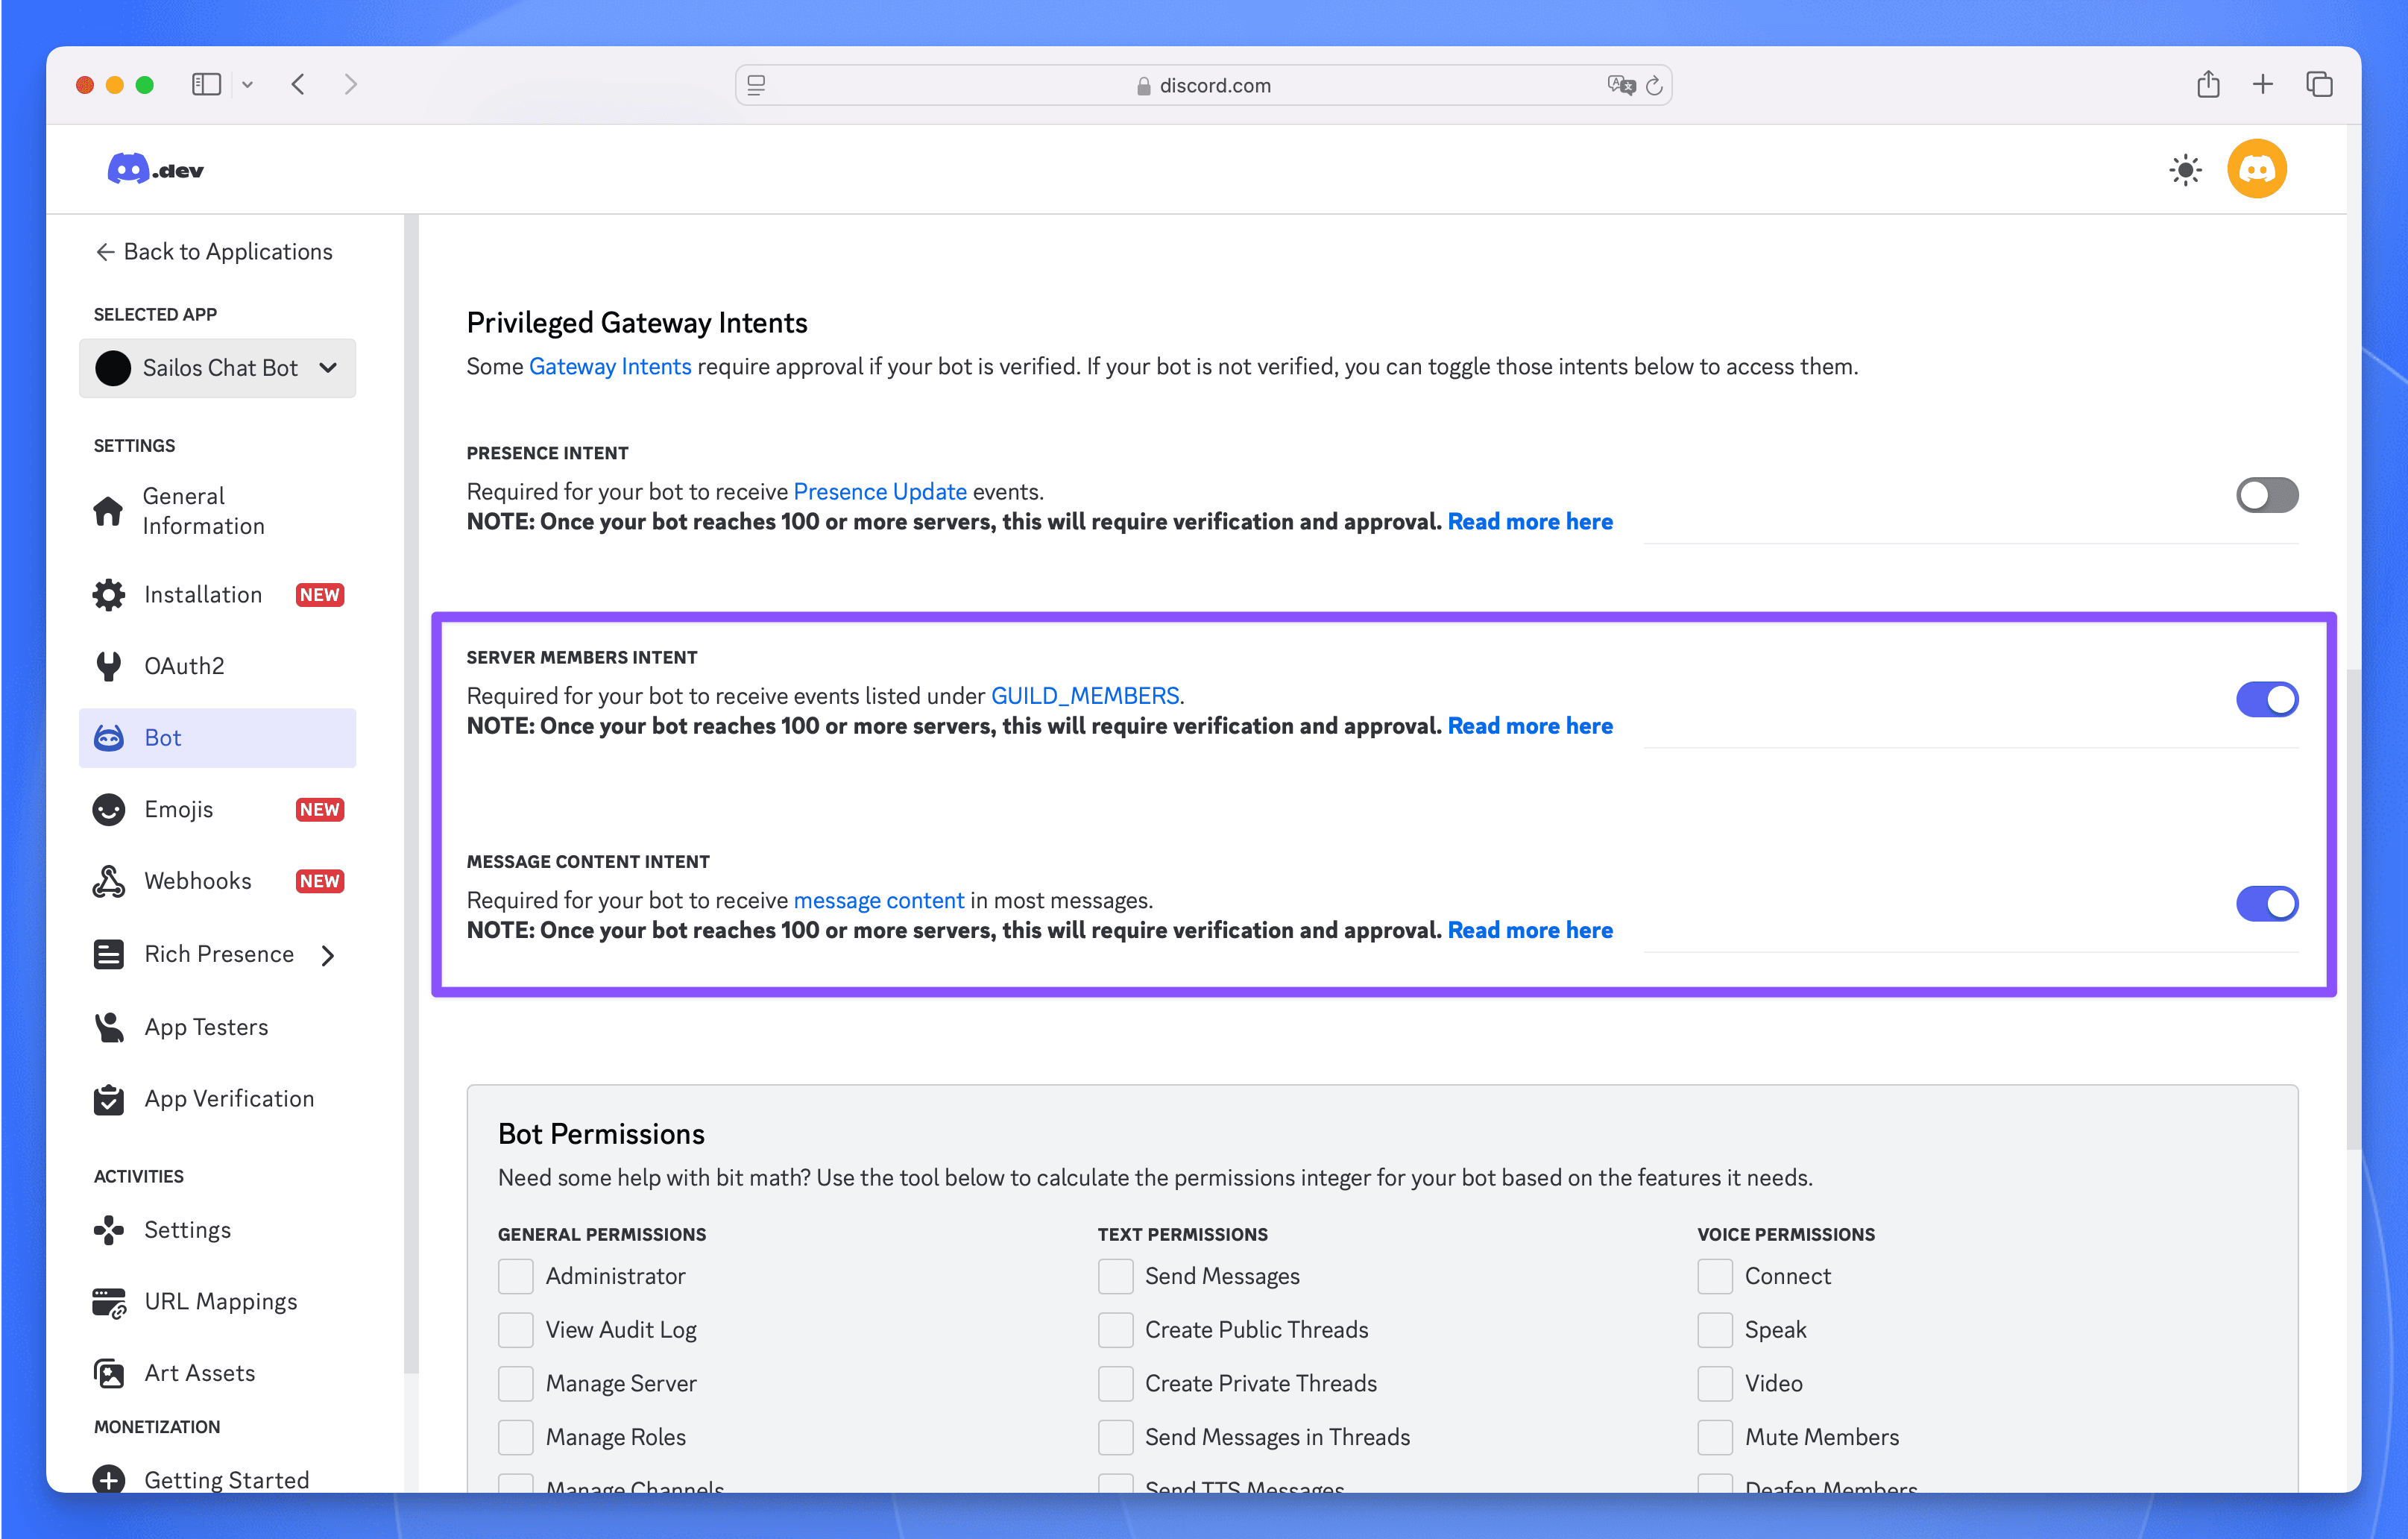 These permissions allow the bot to:
- Access member-related events
- Read and process message content
- Copy your bot token by clicking "Reset Token" and then "Copy"
- Keep this token secure and never share it
- You'll need this token to authenticate your bot
Set Up OAuth2
- Go to OAuth2 section
- Select "bot" scope
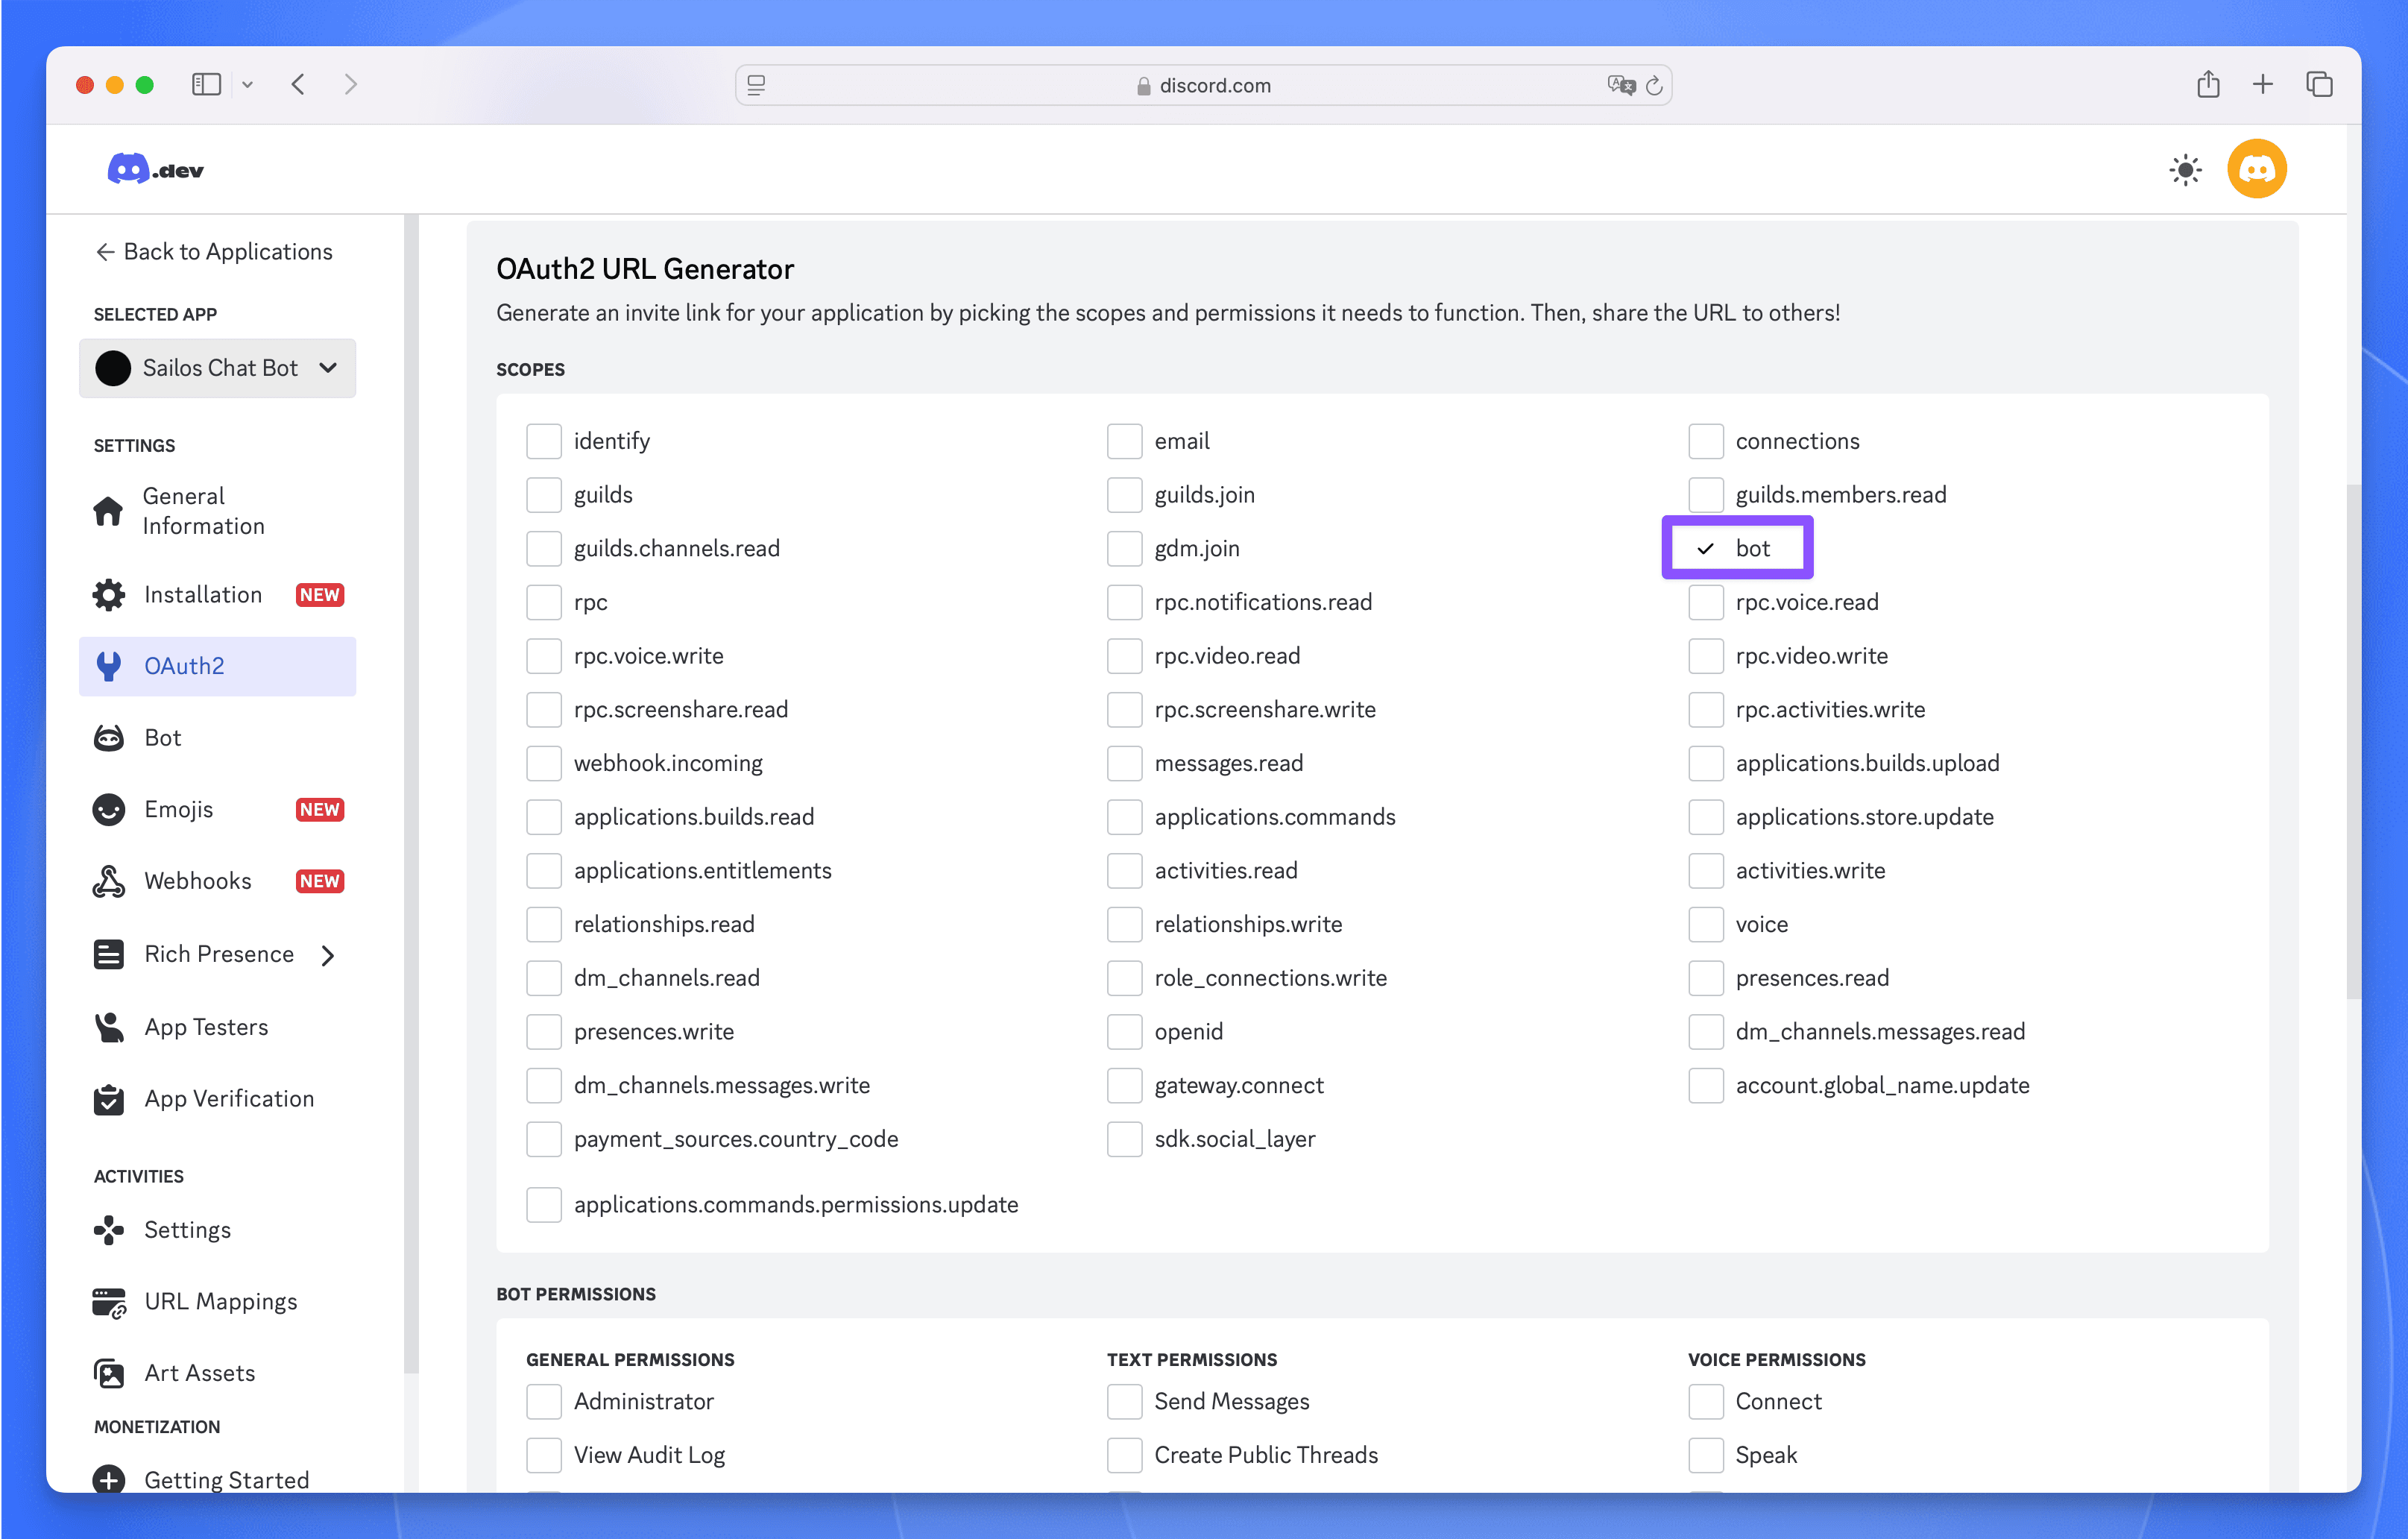
- Choose "Administrator" permissions
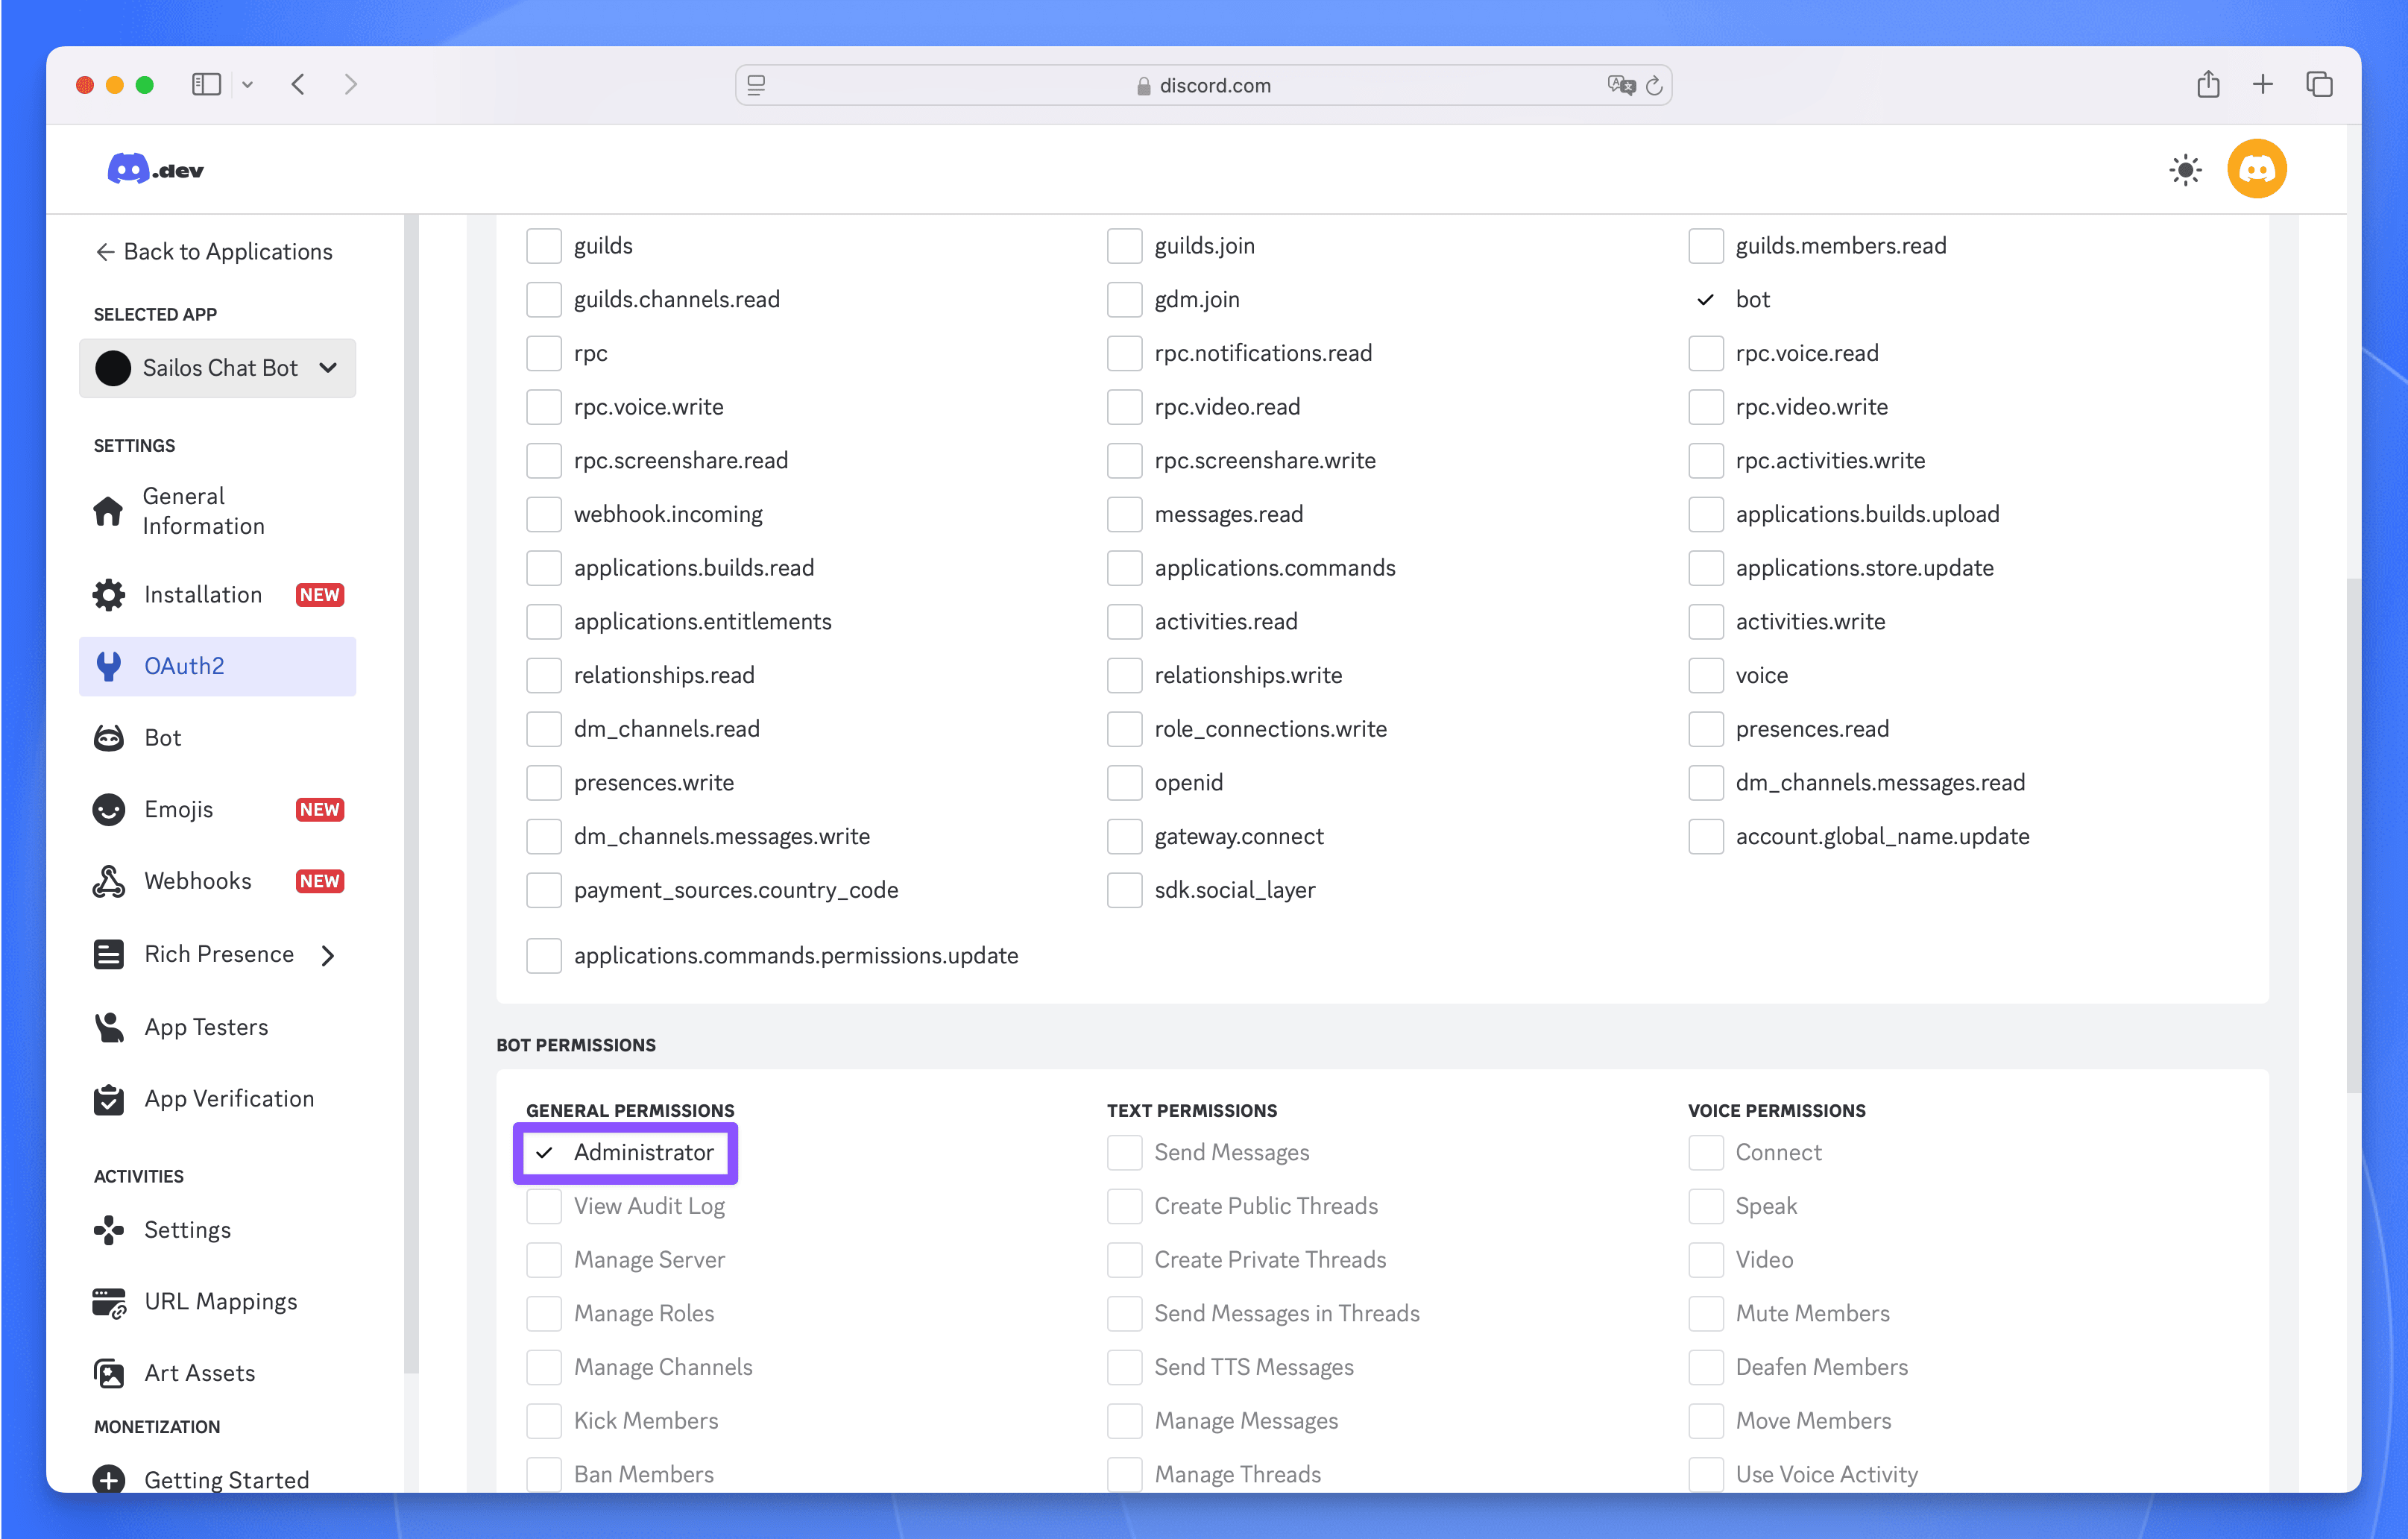
- Copy the generated OAuth2 URL
- Use the URL to add the bot to your server
2. Creating DevBox Project
Initialize Node.js Project
- Create a new DevBox project
- Select Node.js as the runtime
- Configure project resources:
- Set appropriate CPU cores
- Allocate required memory
Set Up Development Environment
- Connect to Your Development Environment
- Install required dependencies:
- Update
package.jsonto enable ES modules:
Project Structure
Create the following file structure:
3. Implementing the Bot
Basic Bot Setup
Create src/index.js:
AI Service Integration
Create src/services/aiService.js:
Configuration Setup
Create .env file in the project root with your credentials:
Update src/index.js to include dotenv configuration:
Start the bot with:
4. FastGPT Integration
FastGPT is an open-source LLM application development platform that allows you to build AI applications with knowledge base capabilities. In this section, we'll walk through the process of setting up FastGPT to power our Discord bot with custom knowledge.
Dataset Creation
- Log into your FastGPT account at FastGPT
- Navigate to the "Datasets" section and click "Create Dataset"
- Choose "General Dataset" as the dataset type
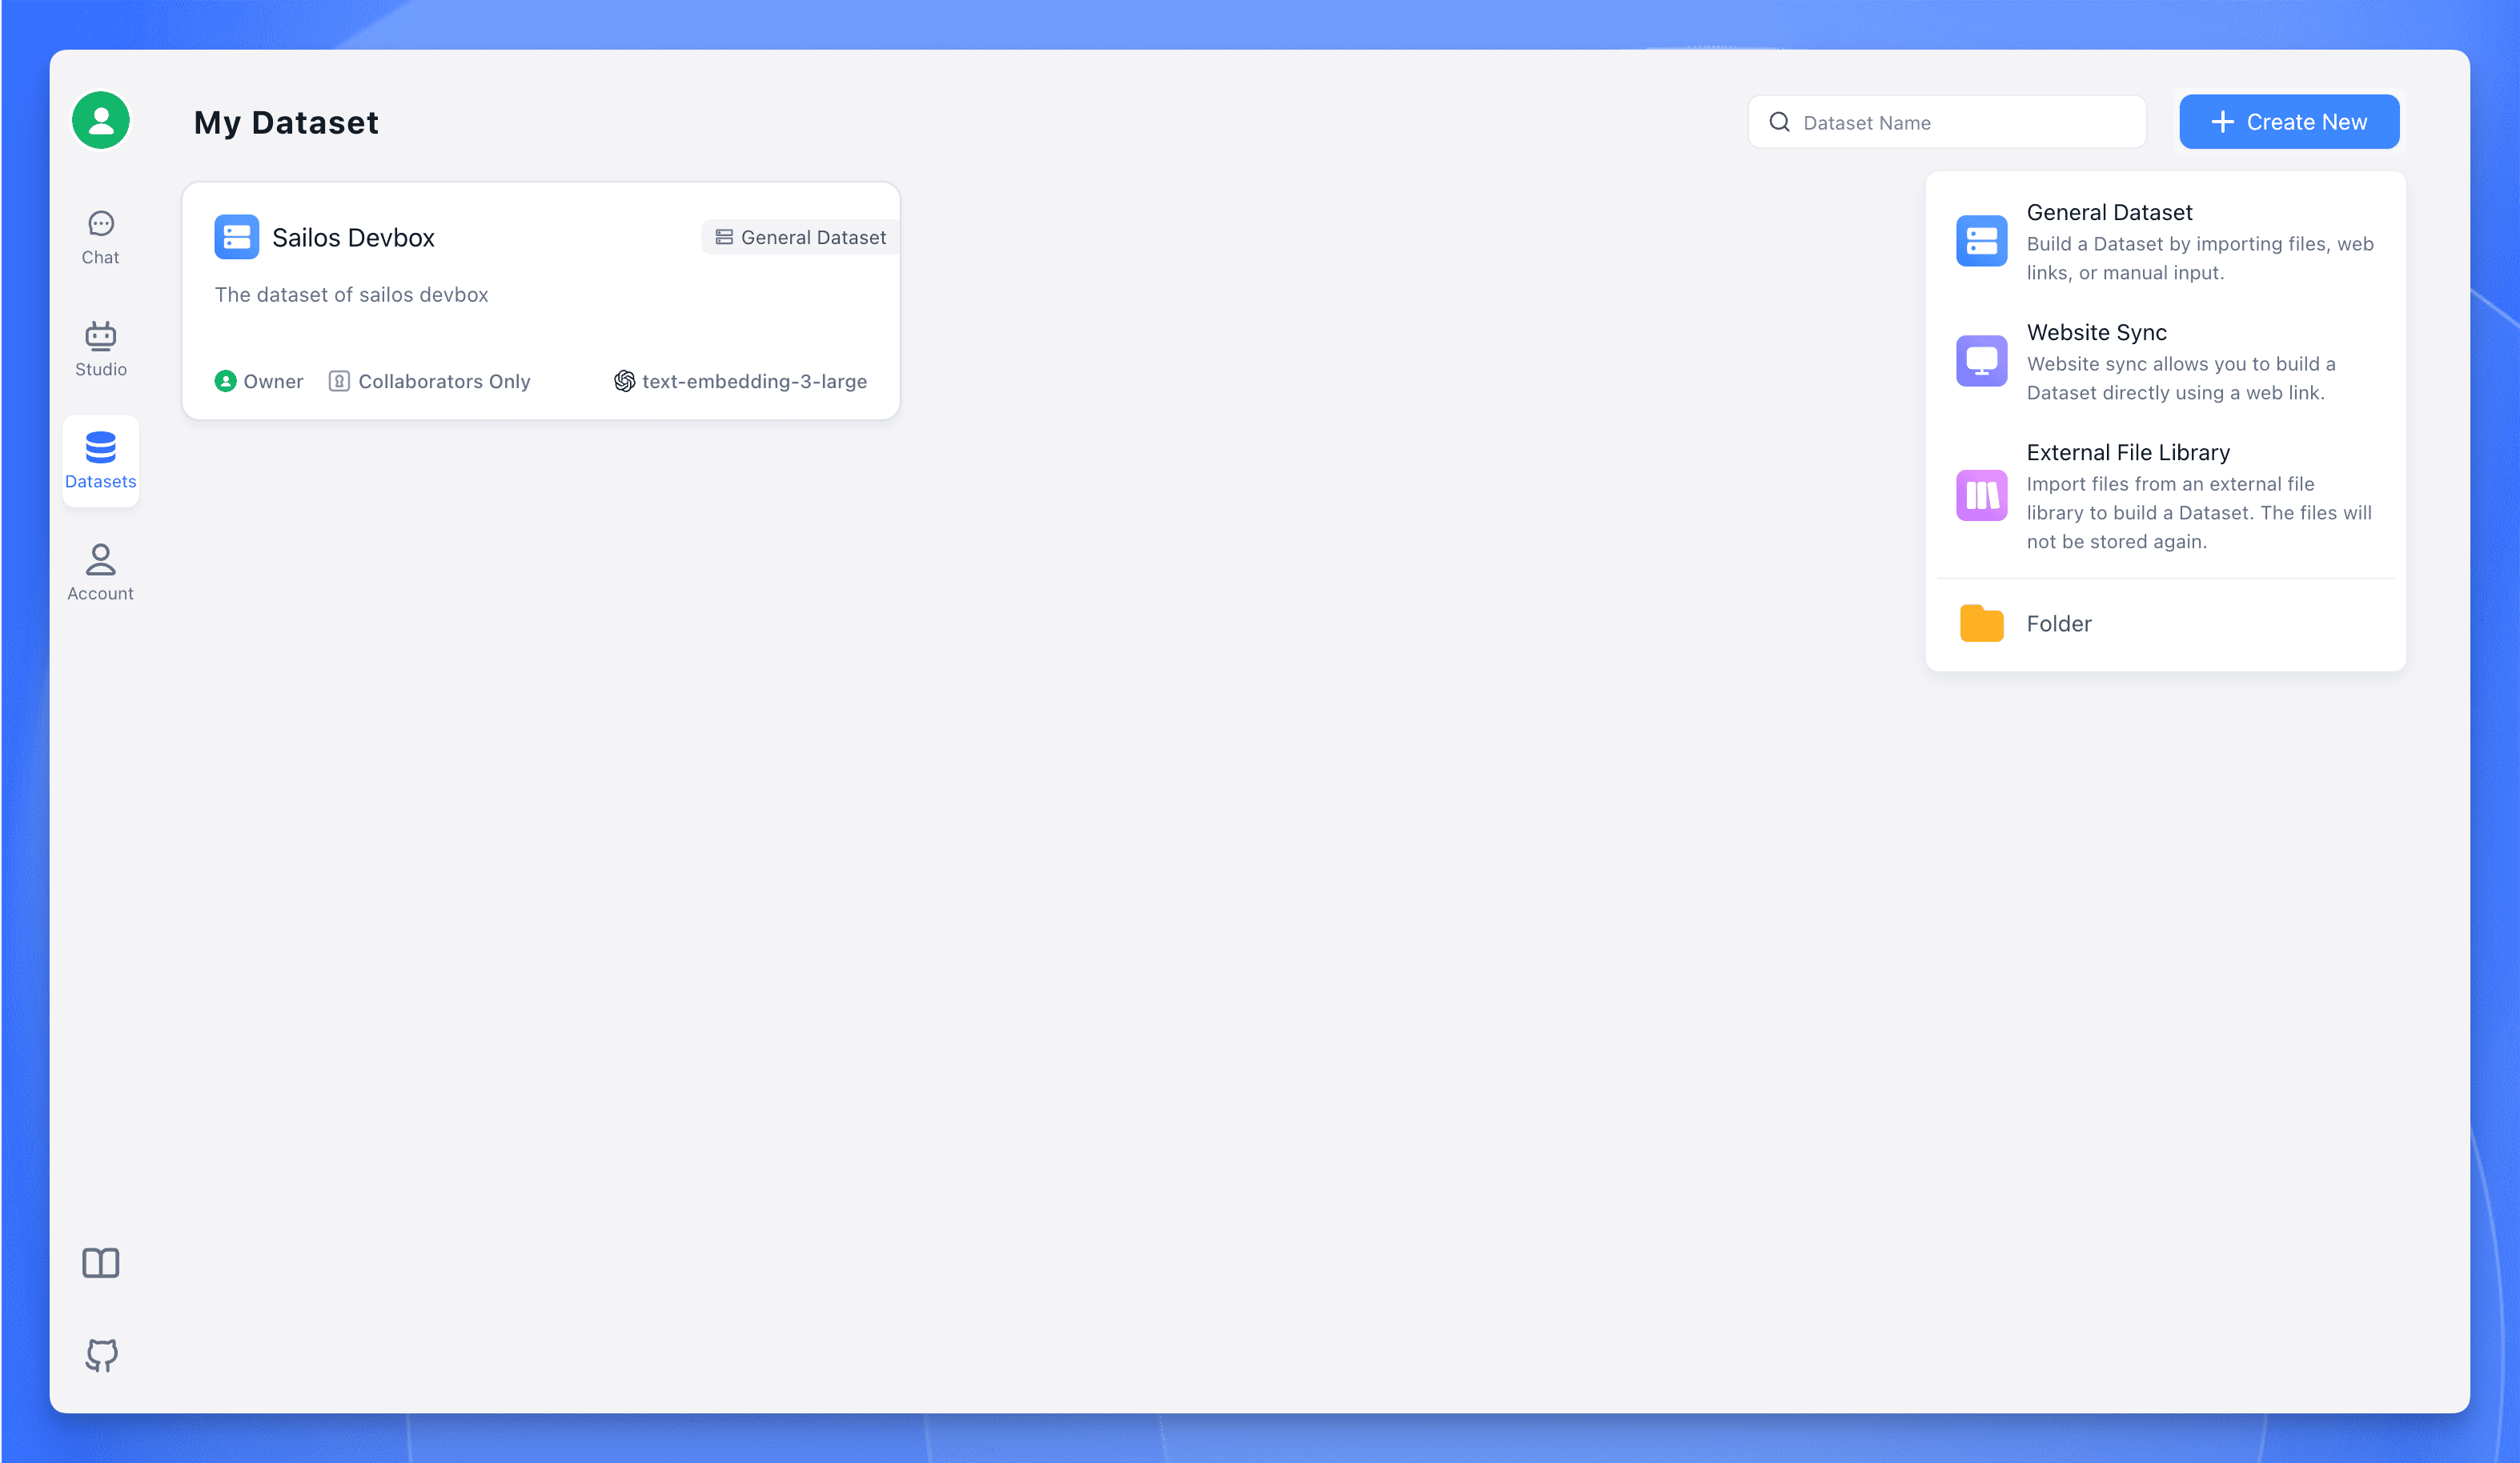
- Select "Text Dataset" for document processing
- Upload your documentation files (supports PDF, TXT, Word, etc.)

- Configure chunking settings if needed (default settings work well for most cases)
- Wait for the training process to complete - this may take several minutes depending on the size of your documentation
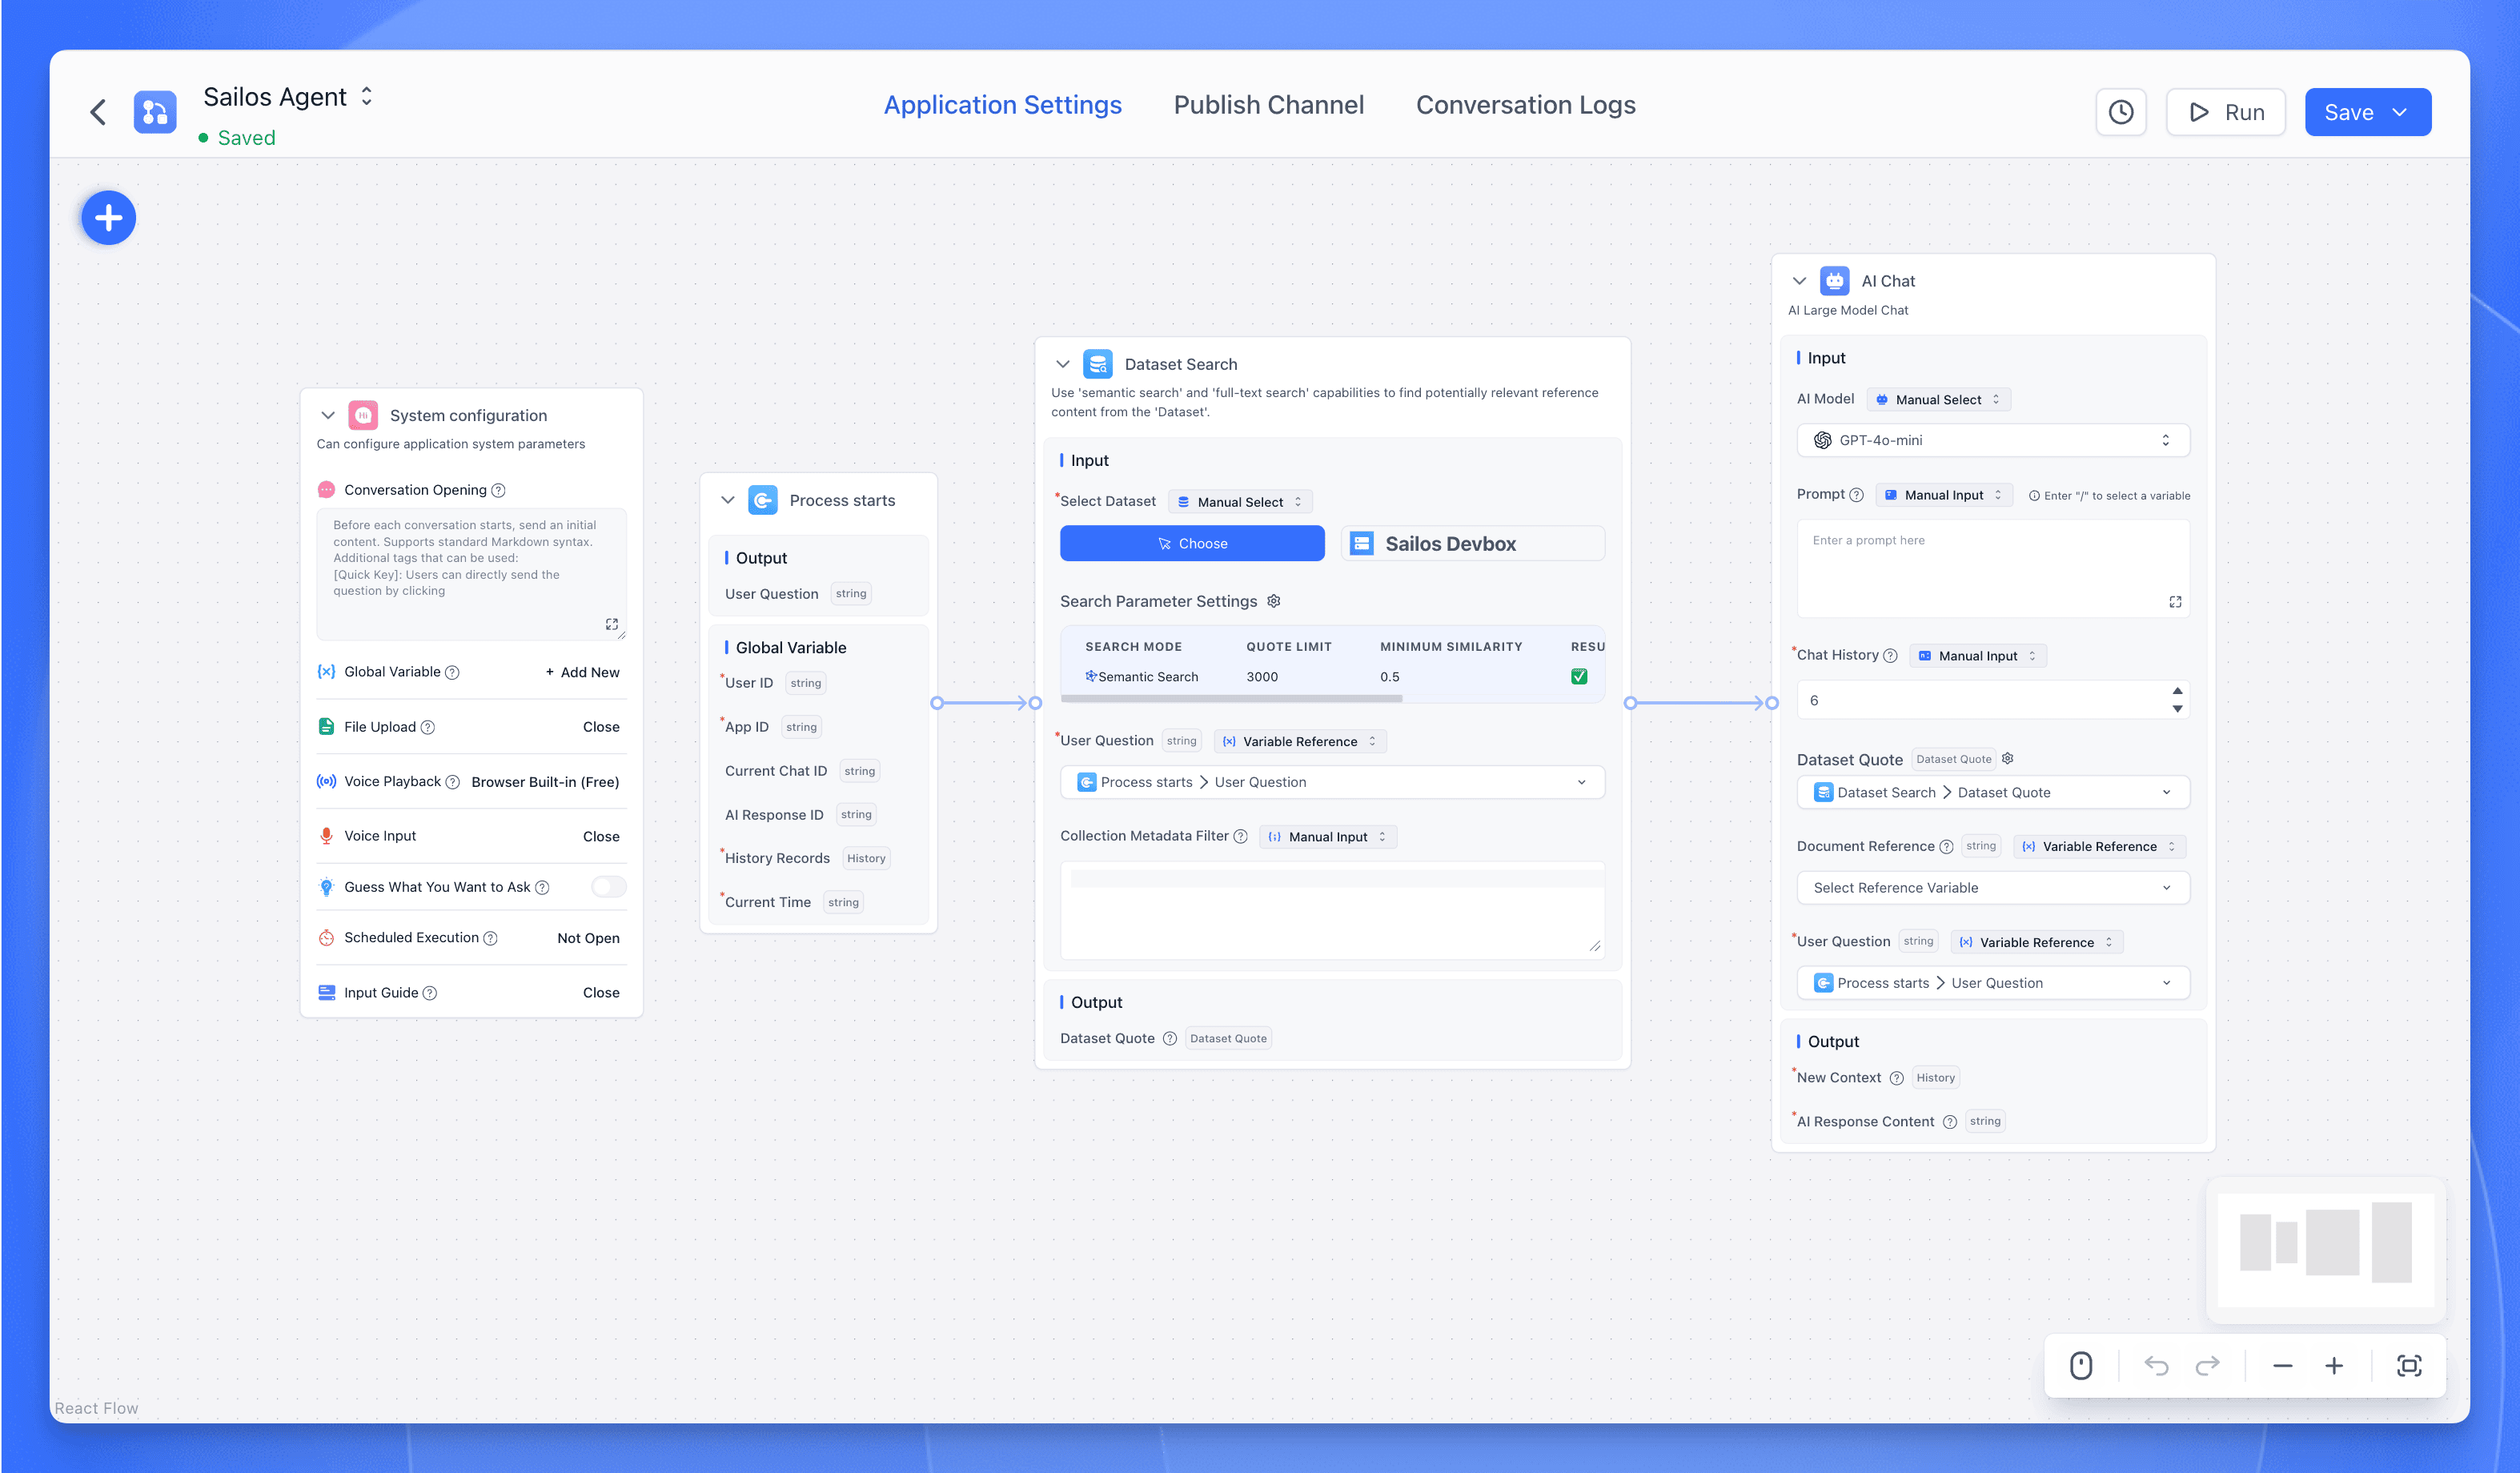
Application Setup
- Go to the "Applications" section and create a new FastGPT application
- In the Flow Editor, add a "Dataset Search" module
- Connect your trained dataset to the search module
- Add an "AI Chat" module and connect it to the search module
- Configure the AI Chat module settings:
- Set temperature (0.7 recommended for balanced responses)
- Adjust max tokens as needed
- Customize the system prompt
API Publication
- Once satisfied with the configuration, click "Publish Channel" to make your application live
- Go to the "API Request" section of your application
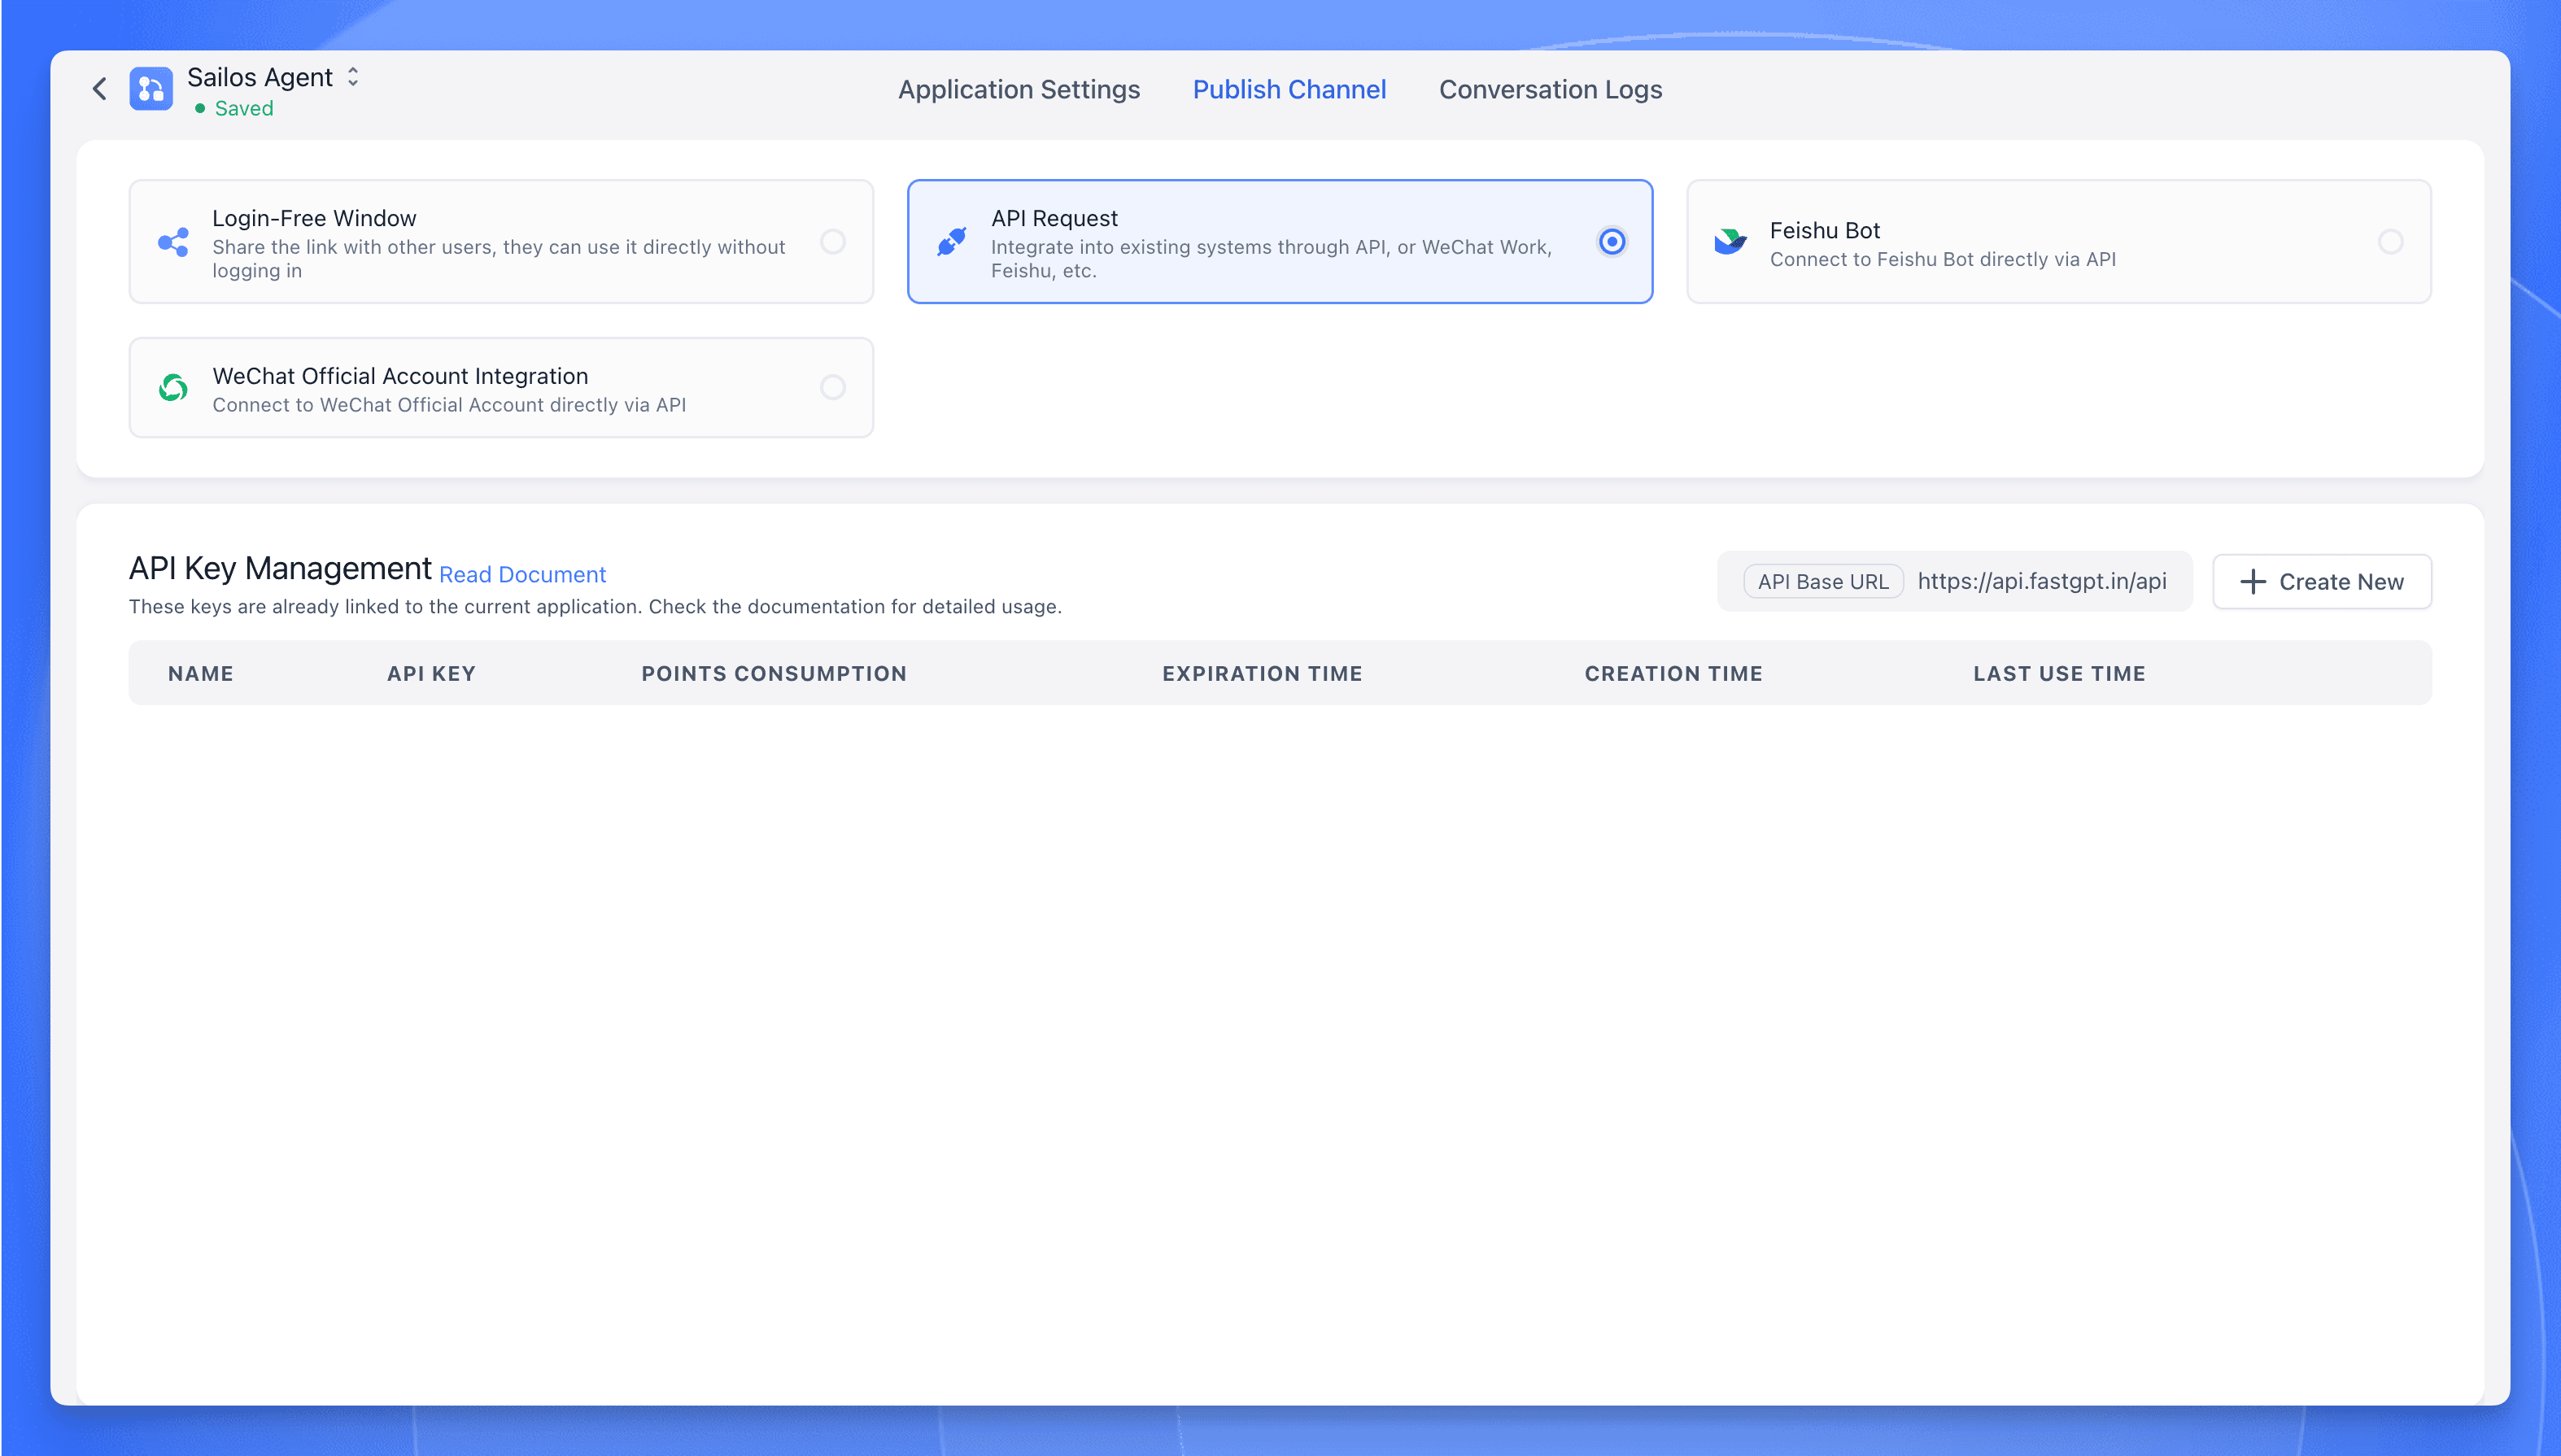
- Generate new API credentials if you haven't already
- Save these important details for the next steps:
- API Base URL: The endpoint for your FastGPT API
- API Key: Your authentication token
These credentials will be used in the .env file we created earlier to connect our Discord bot to the FastGPT backend.
用AI探索
获取这篇文章的AI见解
分享这篇文章
最后更新于